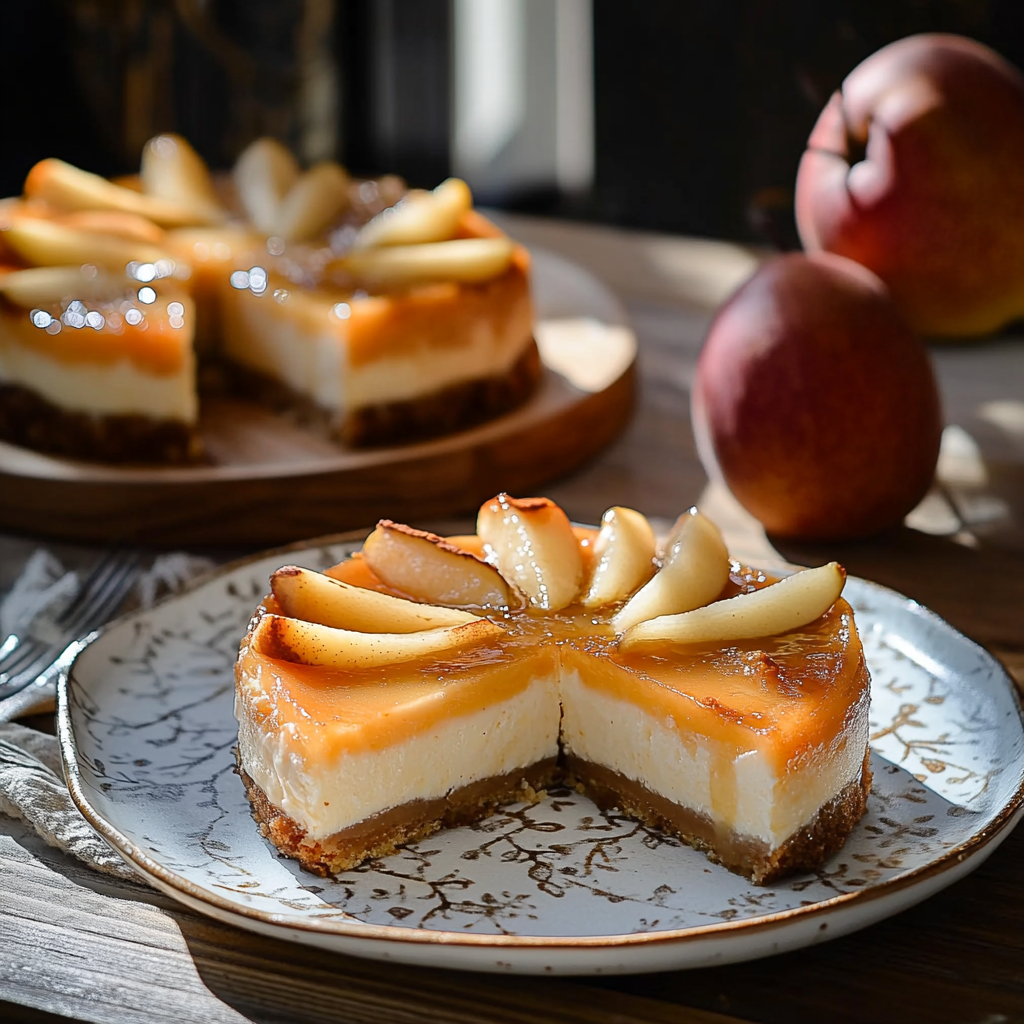
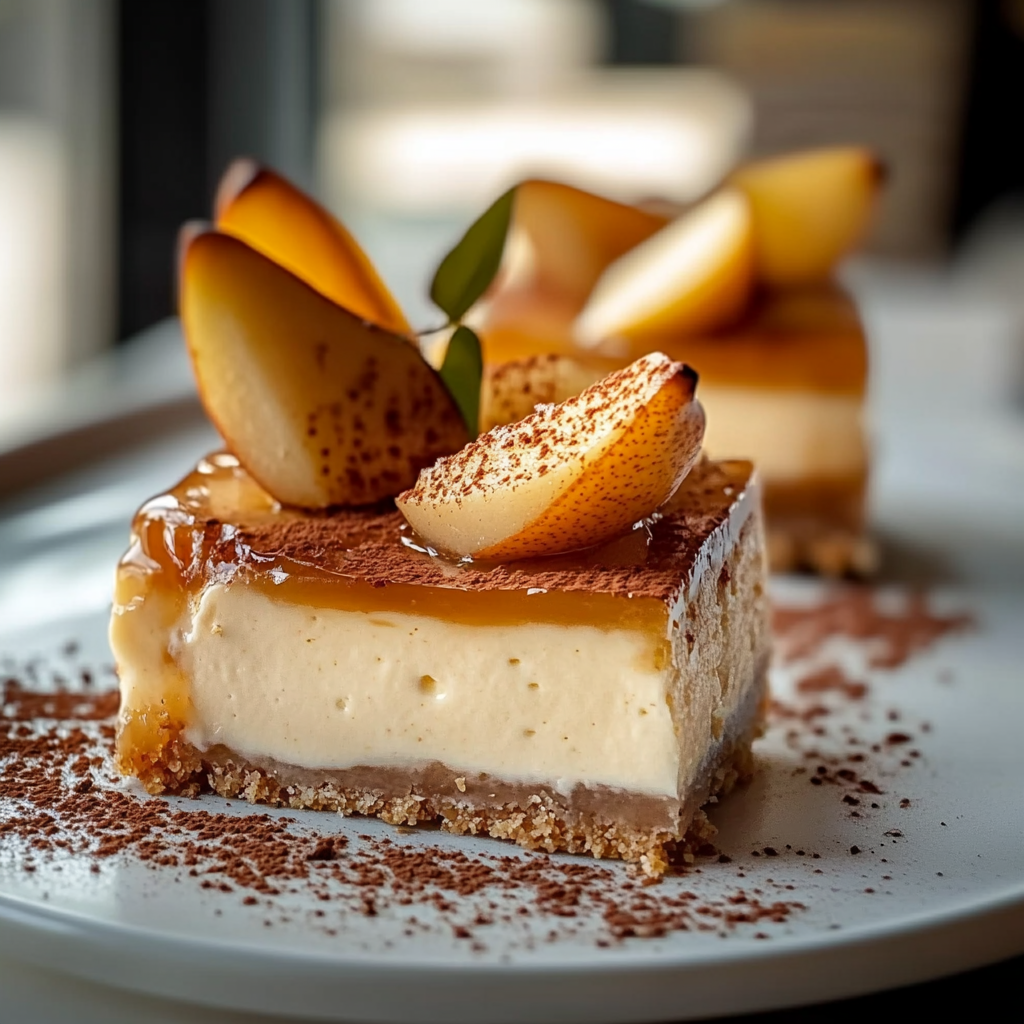
If you’re looking for a dessert that’s both refreshing and indulgent, Pear Mousse Cheesecake Bars are the perfect choice. This delightful recipe combines the creamy, rich texture of a traditional cheesecake with the light, airy nature of a mousse, all with the sweet, subtle flavor of fresh pears. It’s a dessert that’s ideal for any occasion, whether you’re hosting a dinner party, preparing a festive treat for the holidays, or just looking for a special way to treat yourself.

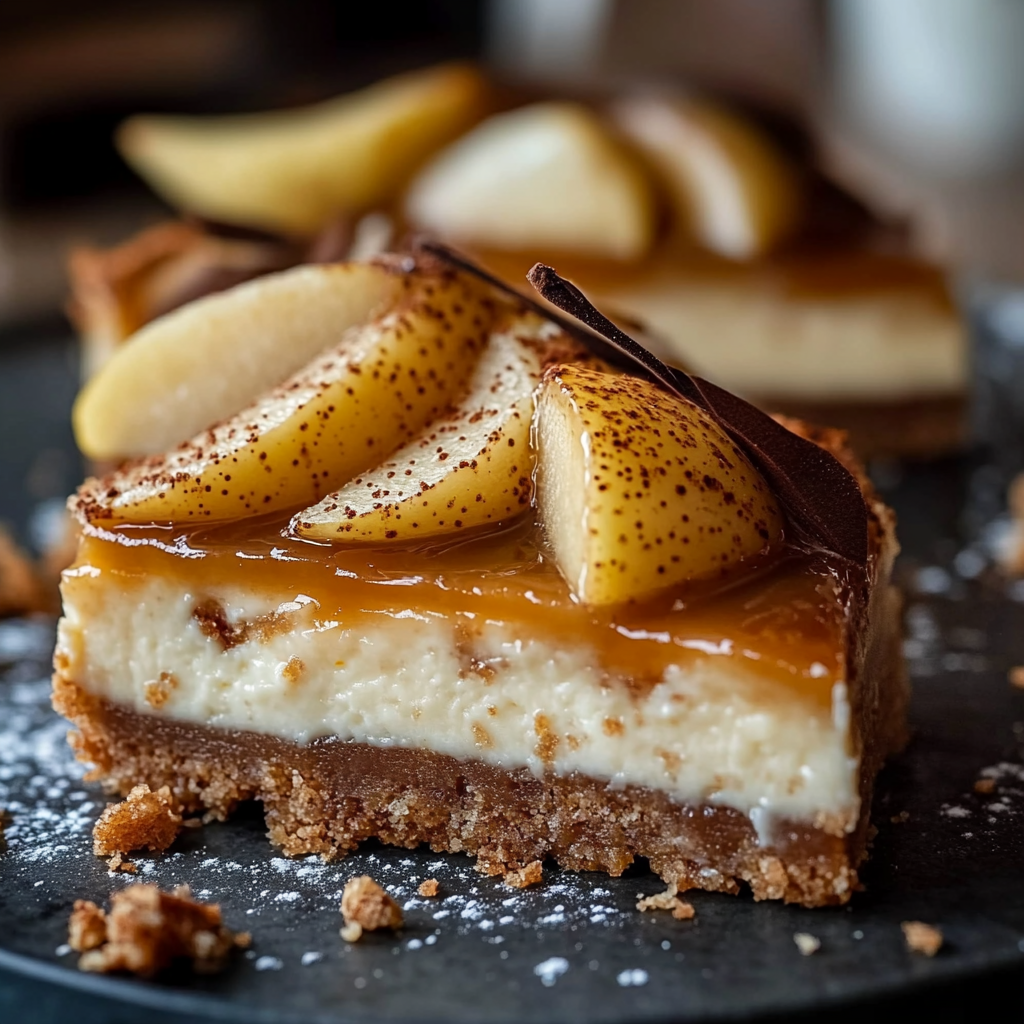
The beauty of these cheesecake bars lies not just in their flavor, but in their unique texture. The base is a buttery, crisp crust that’s perfect for holding up the smooth, tangy cheesecake layer. Topping it all off is the luscious pear mousse, which brings a refreshing sweetness that perfectly balances the richness of the cheesecake. It’s a light, fruity take on the classic cheesecake that will surely become a favorite in your dessert rotation.
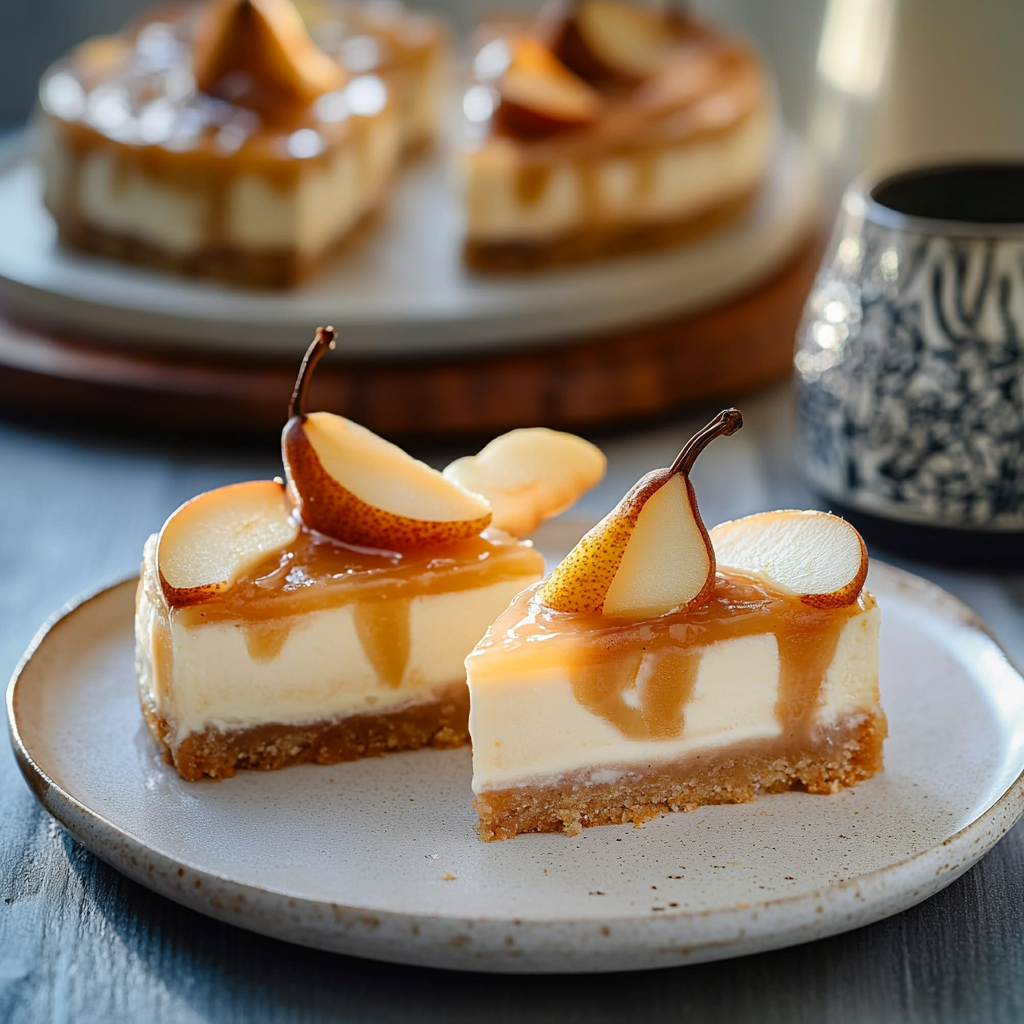
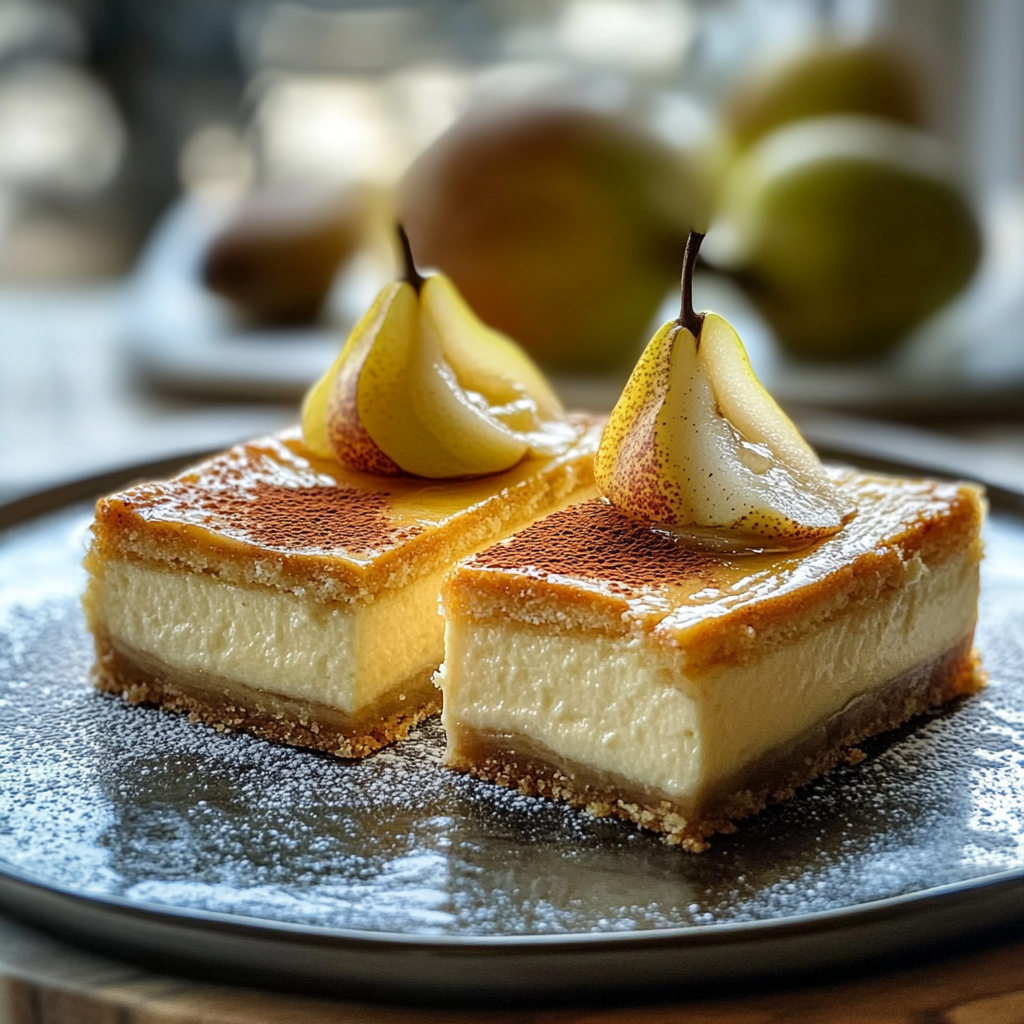
Not only is this recipe visually stunning, but it’s also easy to make and perfect for slicing into squares for serving, making it a crowd-pleaser at any gathering. Plus, the combination of pear and cheesecake offers a twist on traditional fruity desserts that people will rave about.
In this blog, we’ll walk you through the steps to create these Pear Mousse Cheesecake Bars, share some helpful tips, and answer your most common questions to ensure your dessert turns out perfect every time.
What You’ll Need for Pear Mousse Cheesecake Bars
Before diving into the recipe, it’s important to gather all the ingredients and tools you’ll need to make these delightful Pear Mousse Cheesecake Bars. This recipe has three main components: the buttery crust, the creamy cheesecake filling, and the luscious pear mousse topping. Here’s a breakdown of everything you’ll need:
For the Crust:
- 1 ½ cups graham cracker crumbs (about 12 graham crackers, crushed)
- 2 tablespoons granulated sugar
- ¼ teaspoon ground cinnamon
- ½ cup unsalted butter, melted
For the Cheesecake Layer:
- 16 oz cream cheese, softened (2 blocks)
- 1 cup granulated sugar
- 2 large eggs
- 1 teaspoon vanilla extract
- ¼ cup sour cream
- 1 tablespoon all-purpose flour
For the Pear Mousse Layer:
- 1 cup pear puree (from about 2 ripe pears)
- 1 tablespoon fresh lemon juice
- 1 cup heavy cream, whipped to soft peaks
- 1 tablespoon powdered gelatin (or agar-agar if you prefer a plant-based alternative)
- ¼ cup water
- 2 tablespoons granulated sugar (optional, depending on the sweetness of your pears)
Tools You’ll Need:
- 9x9-inch square baking pan or an 8x8 pan
- Parchment paper (optional but helpful for easy removal)
- Hand mixer or stand mixer
- Small saucepan (for dissolving gelatin)
- Spatula
- Medium mixing bowls
How to Make for Pear Mousse Cheesecake Bars
Making Pear Mousse Cheesecake Bars is easier than it sounds. With three simple layers—crust, cheesecake filling, and pear mousse—this recipe is straightforward and beginner-friendly. Here’s a step-by-step guide to creating these delicious bars:
Step 1: Prepare the Crust for Pear Mousse Cheesecake Bars
- Preheat the Oven: Preheat your oven to 325°F (163°C). Line the bottom and sides of a 9x9-inch square baking pan with parchment paper, or lightly grease the pan with non-stick spray.
- Mix the Crust Ingredients: In a medium bowl, combine the graham cracker crumbs, granulated sugar, and ground cinnamon. Stir until evenly combined.
- Add the Butter: Pour in the melted butter and mix everything together until the crumbs are evenly coated and the mixture starts to clump together.
- Press the Crust: Pour the crumb mixture into the prepared pan and press it firmly into an even layer using the back of a spoon or a flat surface. Make sure it’s well packed to create a sturdy base.
- Bake the Crust: Bake the crust in the preheated oven for 10 minutes, then remove it and set it aside to cool while you prepare the cheesecake filling.
Step 2: Make the Cheesecake Layer
- Beat the Cream Cheese: In a large mixing bowl, beat the softened cream cheese with a hand mixer or stand mixer on medium speed until smooth and creamy, about 2 minutes.
- Add Sugar and Eggs: Add the granulated sugar and beat until well combined. Add the eggs one at a time, mixing well after each addition. Stir in the vanilla extract and sour cream until smooth.
- Add Flour: Gently fold in the flour to help stabilize the cheesecake filling.
- Bake the Cheesecake Layer: Pour the cheesecake filling over the cooled crust, smoothing the top with a spatula. Bake at 325°F (163°C) for about 25–30 minutes, or until the center is set but slightly jiggly. The cheesecake layer will continue to firm up as it cools.
- Cool the Cheesecake Layer: Allow the cheesecake to cool completely at room temperature, then place it in the fridge to chill for at least 1 hour.
Step 3: Prepare the Pear Mousse
- Prepare the Pear Puree: In a blender or food processor, puree the peeled pears with fresh lemon juice until smooth. You should have about 1 cup of pear puree.
- Dissolve the Gelatin: In a small saucepan, add ¼ cup water and sprinkle the gelatin over the surface. Let it sit for about 5 minutes to bloom. Heat the mixture over low heat, stirring constantly, until the gelatin is completely dissolved. Remove from heat and set aside to cool slightly.
- Whip the Cream: In a separate bowl, beat the heavy cream until soft peaks form. You can add a tablespoon of powdered sugar if you’d like the mousse to be sweeter.
- Combine the Pear Puree and Gelatin: Add the cooled gelatin mixture to the pear puree and mix well.
- Fold in the Whipped Cream: Gently fold the whipped cream into the pear mixture, being careful not to deflate the cream. The mousse should be light and fluffy.
- Spread the Mousse Layer: Once the cheesecake layer has fully cooled, gently spread the pear mousse on top of the cheesecake, smoothing it into an even layer.
- Chill: Refrigerate the entire dessert for at least 4 hours, or preferably overnight, to allow the mousse to set and the layers to firm up.
Serving and Storage Tips for Pear Mousse Cheesecake Bars
These Pear Mousse Cheesecake Bars not only look elegant, but they’re also easy to slice and serve, making them perfect for parties or family gatherings. Here are some helpful tips for serving and storing:
Serving Tips for Pear Mousse Cheesecake Bars:
- Cut Into Bars: After the dessert has set in the fridge, carefully remove it from the pan using the parchment paper. Place it on a cutting board and use a sharp knife to cut the cheesecake into squares or bars. For cleaner slices, dip the knife into warm water and wipe it clean between each cut.
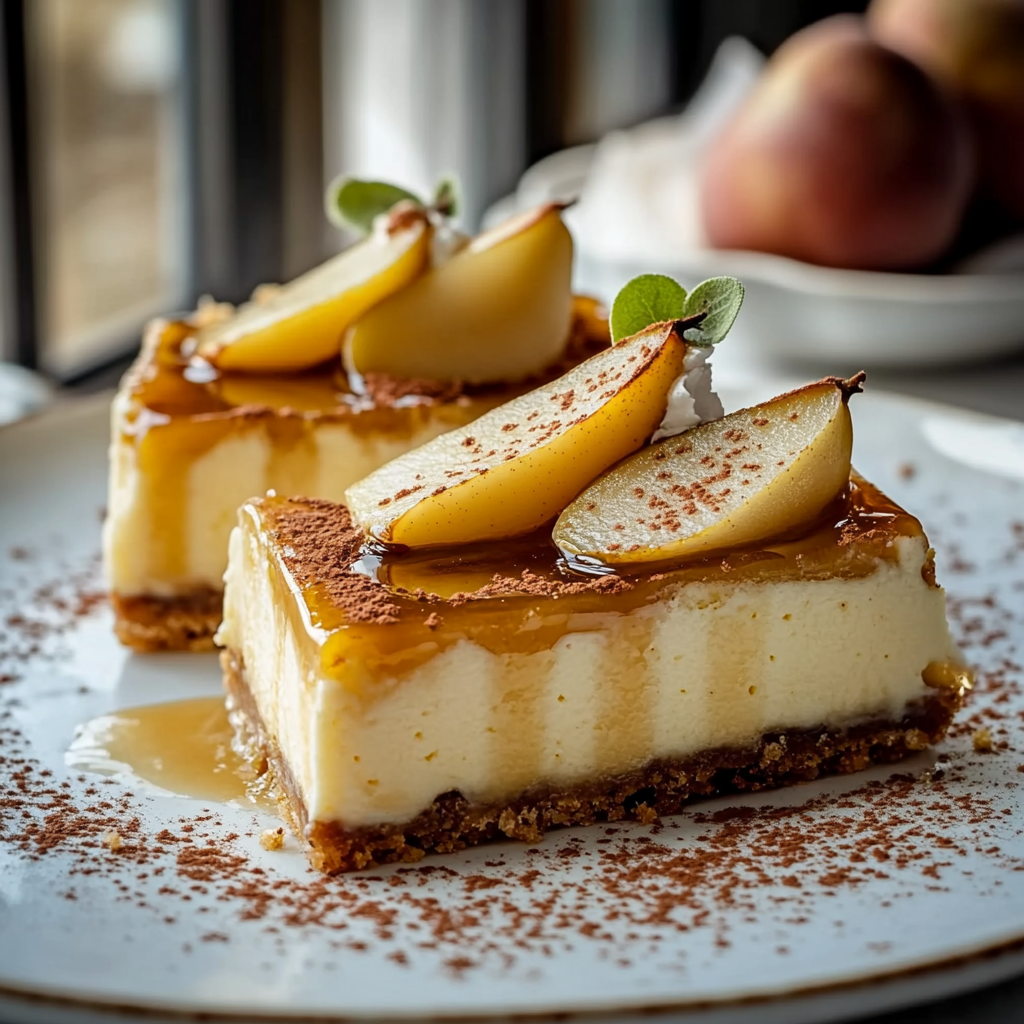
- Garnish for Extra Elegance: To make your Pear Mousse Cheesecake Bars look even more beautiful, consider garnishing them with thin slices of pear, a dusting of cinnamon, or a drizzle of caramel sauce. You can also add a few fresh mint leaves to enhance the visual appeal.
- Serve Chilled: These cheesecake bars are best served chilled, as the mousse layer stays light and creamy when kept cool. Let the bars sit for a few minutes at room temperature before serving, if needed, to make slicing easier.
Storage Tips for Pear Mousse Cheesecake Bars:
- Refrigeration: Store any leftover cheesecake bars in an airtight container in the refrigerator for up to 5 days. They’ll stay fresh and creamy when properly stored.
- Freezing: If you want to make these bars ahead of time or have leftovers you’d like to save, you can freeze them. To do so, first, slice the bars and place them on a baking sheet lined with parchment paper. Freeze for 1-2 hours, then transfer the bars to an airtight container or freezer bag. They will stay good for up to 2 months. When ready to serve, simply thaw them in the refrigerator overnight.
- Avoid Freezing the Pear Mousse: While the cheesecake bars freeze well, the mousse layer may lose its light texture when frozen and thawed. To maintain the creamy consistency, it’s best to freeze the bars with the mousse layer only after it has set and firmed up, then thaw them in the fridge before serving.
Mistakes to Avoid for Pear Mousse Cheesecake Bars
While Pear Mousse Cheesecake Bars are relatively simple to make, there are a few key mistakes that can affect the texture and flavor of your dessert. Here are some common pitfalls to watch out for:
1. Overbaking the Cheesecake Layer
One of the most common mistakes when making cheesecake bars is overbaking the cheesecake filling. Overbaking can cause the cheesecake to dry out, crack, or become too firm. The key is to bake it just until the center is set but still slightly jiggly. As it cools, the filling will continue to firm up, so don’t worry if it’s a little wobbly in the center when you take it out of the oven. Bake the cheesecake layer at 325°F (163°C) for 25-30 minutes, and make sure to let it cool completely before adding the mousse layer.
2. Not Allowing Enough Chilling Time
Patience is crucial when making mousse and cheesecake bars. Both the cheesecake and mousse need time to chill and set properly. Skipping the chilling step or not letting the dessert set long enough can lead to a messy slice or a mousse that doesn’t hold its shape. Be sure to refrigerate the bars for at least 4 hours, but overnight is ideal for the best results.
3. Using Cold Ingredients for the Cheesecake Filling
For the smoothest cheesecake filling, make sure the cream cheese is at room temperature. Cold cream cheese can result in a lumpy, uneven filling. Likewise, let the eggs and sour cream come to room temperature before mixing to ensure a smoother batter. Softening these ingredients ensures that they blend together seamlessly without lumps or curdles.
4. Forgetting to Bloom the Gelatin for the Mousse
Gelatin is essential for creating the right texture in the pear mousse. However, if you don’t properly “bloom” the gelatin by letting it absorb water before heating it, it may not dissolve properly. This can cause the mousse to have an uneven texture. Be sure to sprinkle the gelatin over the water and allow it to sit for a few minutes before heating to ensure it dissolves fully.
5. Not Whipping the Cream to Soft Peaks
Whipping the heavy cream to soft peaks is a crucial step in creating the light and airy mousse layer. If the cream is overwhipped, it can become stiff and grainy, which may affect the mousse’s texture. On the other hand, underwhipping the cream will prevent it from holding its shape. Whip the cream until soft peaks form, which means the cream holds a gentle peak but the tip falls over when you lift the beaters.
Tips and Tricks for Pear Mousse Cheesecake Bars
To help ensure your Pear Mousse Cheesecake Bars turn out perfectly, here are some tips and tricks to keep in mind as you make them:
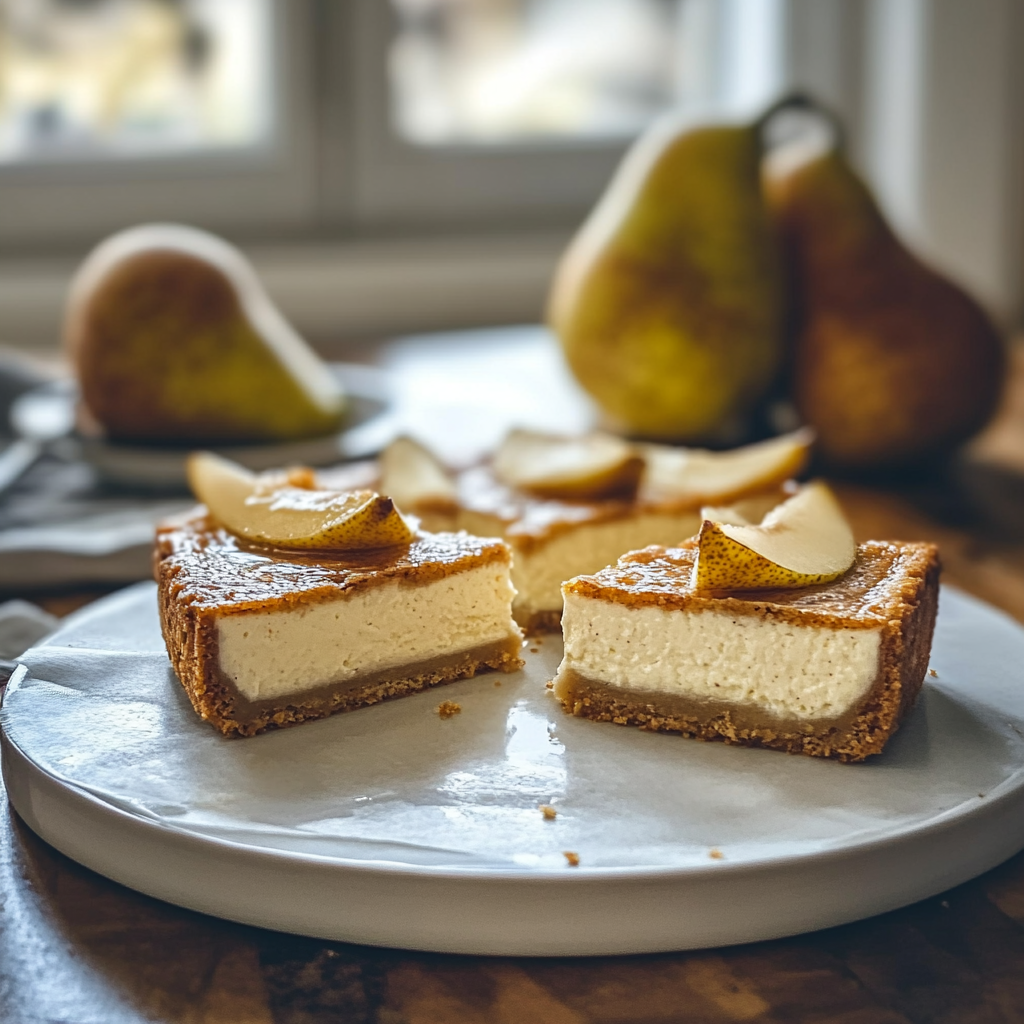
1. Use Fresh Pears for the Best Flavor
For the pear mousse layer, it’s best to use fresh, ripe pears. You can use any variety of pear, but Bartlett or Anjou pears are particularly sweet and tender, which work wonderfully in the mousse. If you can’t find ripe pears, consider purchasing canned pear puree (unsweetened) as a substitute, but fresh pears will always deliver the best flavor.
2. Make the Crust Your Own
While the traditional graham cracker crust works beautifully for this recipe, you can easily switch it up based on your taste preferences. Consider using digestive biscuits, speculoos cookies, or even chocolate cookies for a different flavor profile. For a nutty twist, you can mix in some finely ground almonds or walnuts to the crust mixture.
3. Be Gentle When Folding the Whipped Cream
When adding the whipped cream to the pear puree, it’s important to fold gently to keep the mousse light and airy. Use a spatula and fold in the whipped cream in gentle motions, scraping from the bottom of the bowl and turning it over. This will ensure that the mousse doesn’t lose its fluffiness and texture.
4. Add a Hint of Spice
For an added layer of flavor, try adding a pinch of cinnamon or nutmeg to the pear mousse or the crust. These warm spices complement the natural sweetness of the pears and give the dessert a cozy, comforting feel. You could even experiment with adding a little vanilla extract to the mousse to enhance its depth of flavor.
5. Avoid Overmixing the Cheesecake Filling
When preparing the cheesecake filling, be sure not to overmix the ingredients after adding the eggs. Overmixing can incorporate too much air, which can cause cracks during baking. Mix just until everything is combined and smooth. The less air in the filling, the better.
Suggestions for Pear Mousse Cheesecake Bars
While the Pear Mousse Cheesecake Bars are delicious as is, you can customize them with a few different twists to make them even more unique or fit different occasions. Here are a few suggestions to help you tailor the recipe to your taste:
1. Add a Fruit Compote or Jam Topping
If you want an extra burst of fruity flavor, top your pear mousse cheesecake bars with a homemade fruit compote or jam. A strawberry or raspberry compote pairs wonderfully with the pear mousse, adding a tangy contrast to the sweet, smooth flavors of the cheesecake. Simply simmer the fruit of your choice with a bit of sugar until it thickens, and drizzle it over the chilled bars just before serving.
2. Experiment with the Crust for Pear Mousse Cheesecake Bars
For those who like to get creative with textures and flavors, try switching up the crust. Use chocolate cookies like Oreo or even gingersnap cookies for a bold flavor contrast. For a nuttier option, consider adding crushed pistachios, hazelnuts, or almonds to the graham cracker crust to give it some extra crunch and flavor.
3. Serve with Whipped Cream
Though the mousse layer is rich and fluffy, a dollop of freshly whipped cream on top of each bar can elevate the dessert to another level. You can also garnish with a sprinkle of cinnamon, cocoa powder, or a few pear slices for a more sophisticated presentation.
4. Make Mini Cheesecake Bars
If you’re hosting a party or special occasion, consider turning this recipe into individual servings. Use a mini muffin tin or small tart pans to create individual mini pear mousse cheesecakes. You’ll get all the same delicious flavors but in a cute, single-serving form perfect for guests to grab and go.
5. Try a Different Fruit
While pears are the star of this dessert, you can easily swap them out for other fruits depending on the season or your preference. Try apples, peaches, or even mangoes for a tropical twist. The mousse layer will pair beautifully with a variety of fruits, so feel free to experiment and find your favorite combination.
FAQ for Pear Mousse Cheesecake Bars
Here are some frequently asked questions about making Pear Mousse Cheesecake Bars:
1. Can I make these bars in advance?
Absolutely! These cheesecake bars are perfect for making ahead. In fact, they benefit from sitting in the fridge overnight, as the flavors meld together and the layers set beautifully. You can make the entire dessert up to 2 days in advance, then slice and serve when you’re ready.
2. Can I use canned pears instead of fresh?
Yes, you can use canned pears in syrup or water if fresh pears are not available. Just make sure to drain them well and puree them until smooth. If the canned pears are too sweet, you might want to reduce the amount of sugar added to the mousse layer.
3. How can I make this dessert dairy-free or vegan?
To make this dessert vegan, you can substitute the cream cheese with a vegan cream cheese alternative, and replace the eggs with flax eggs (1 tablespoon of flax meal mixed with 3 tablespoons of water, left to thicken for 5 minutes). For the mousse, use coconut cream or a plant-based heavy cream alternative. Check for vegan-friendly gelatin alternatives, such as agar agar.
4. Can I freeze these cheesecake bars?
Yes, you can freeze Pear Mousse Cheesecake Bars. To freeze, first chill the dessert completely, then slice it into bars and place them on a baking sheet lined with parchment paper. Freeze them for 1–2 hours until firm, then transfer them to an airtight container or freezer bag for long-term storage. They’ll keep for up to 2 months in the freezer. When ready to serve, let them thaw in the refrigerator overnight.
5. What if my mousse layer doesn’t set properly?
If your mousse layer doesn't set as expected, it could be due to improperly bloomed gelatin or overwhipping the cream. Make sure you follow the directions for blooming the gelatin properly and be gentle when folding in the whipped cream. If the mousse is too runny, you can refrigerate it for longer to help it firm up. If the texture is still off, you may need to remake the mousse with a fresh batch of gelatin.
Conclusion for Pear Mousse Cheesecake Bars
These Pear Mousse Cheesecake Bars are the ultimate dessert to serve at any gathering. With their creamy cheesecake filling, airy pear mousse topping, and buttery crust, they strike the perfect balance between indulgent and light. The best part? They can be made ahead of time, freeing you up to enjoy the party or meal without stressing over the last-minute dessert prep.
Whether you stick with the classic pear flavor or add your own twist, these bars are versatile and sure to impress your guests. Perfect for the holidays, birthdays, or any occasion that calls for something a little special, they bring a refreshing yet decadent touch to your dessert table.
So next time you want to make a dessert that’s as delightful to eat as it is to look at, give these Pear Mousse Cheesecake Bars a try. With a little patience and the right ingredients, you’ll be treating yourself (and others) to a dessert that’s sure to become a favorite.
Enjoy your baking, and don’t forget to share the love by passing along this recipe to friends and family!
Print
Pear Mousse Cheesecake Bars: A Creamy, Fruity Delight
- Total Time: 1 hour
Description
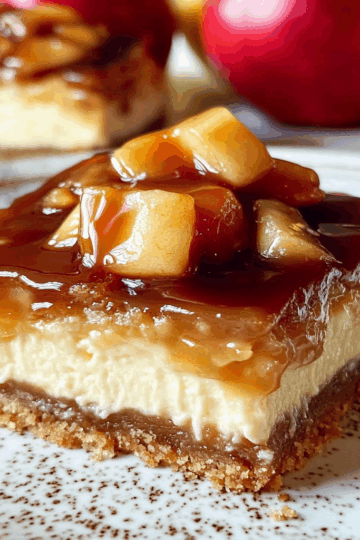
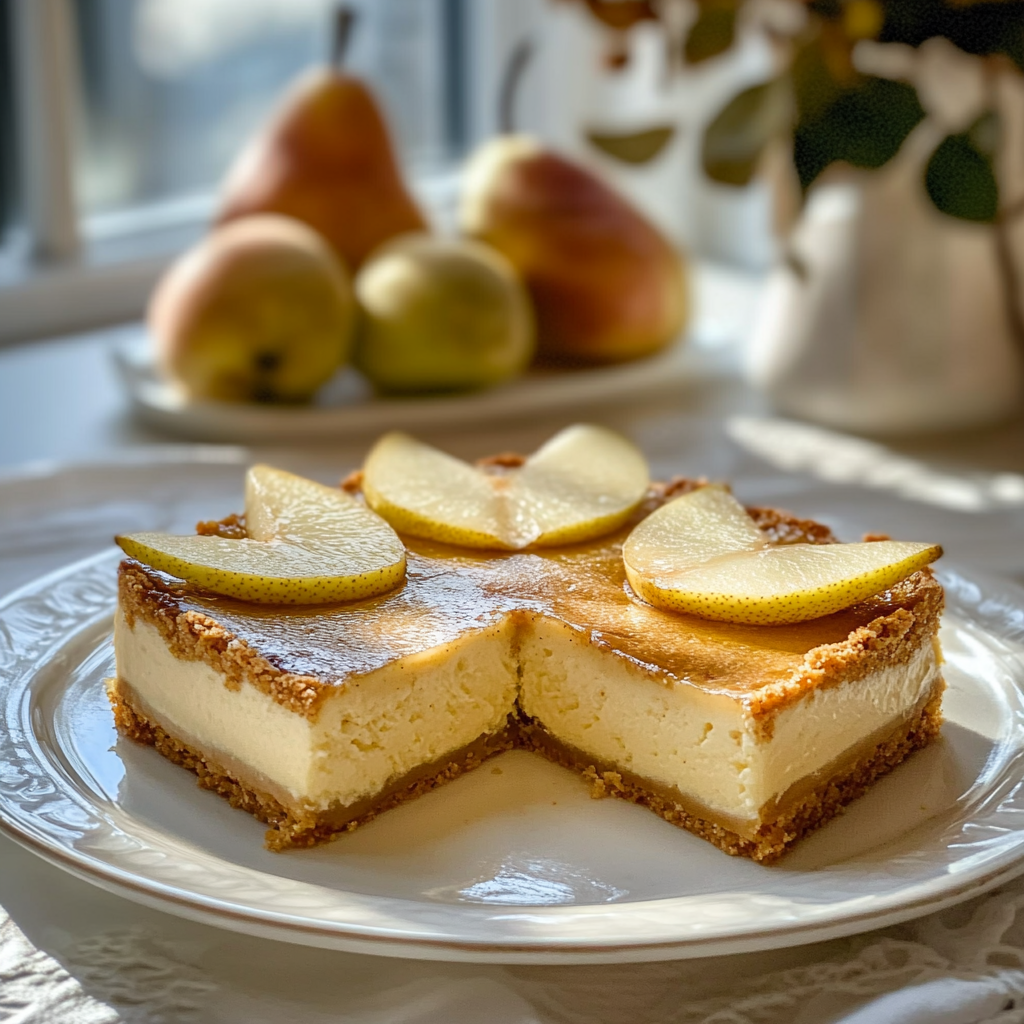
These Pear Mousse Cheesecake Bars feature a smooth, creamy cheesecake filling topped with a fluffy pear mousse. Nestled on a buttery graham cracker crust, this dessert is the perfect balance of sweet, fruity, and rich flavors. The bars are easy to make and ideal for any special occasion!
Ingredients
For the Crust:
- 1 ½ cups graham cracker crumbs
- ¼ cup granulated sugar
- ½ cup unsalted butter, melted
For the Cheesecake Layer:
- 16 oz cream cheese, softened
- ½ cup sour cream
- ½ cup granulated sugar
- 2 large eggs, room temperature
- 1 tsp vanilla extract
- ¼ tsp salt
For the Pear Mousse Layer:
- 1 ½ cups ripe pear, pureed (about 2 medium pears)
- ½ cup heavy cream
- ½ cup granulated sugar
- 1 tbsp gelatin powder
- ¼ cup water
- 1 tsp lemon juice
- ½ tsp vanilla extract
Instructions
- Preheat the oven to 325°F (163°C). Line a 9x9-inch baking dish with parchment paper or lightly grease it.
- Make the crust:
In a medium bowl, combine graham cracker crumbs, granulated sugar, and melted butter. Stir until the mixture is evenly coated. Press the crumb mixture into the bottom of the prepared pan, packing it tightly. Bake for 8-10 minutes, then remove from the oven and set aside to cool. - Prepare the cheesecake filling:
In a large bowl, beat the cream cheese with an electric mixer until smooth and creamy. Add the sour cream, sugar, eggs, vanilla extract, and salt, and beat until smooth and fully combined. Pour the mixture over the cooled crust and smooth the top with a spatula. - Bake the cheesecake layer:
Bake the cheesecake for 25-30 minutes, or until the center is set but still slightly wobbly. Let it cool to room temperature, then refrigerate for at least 2 hours. - Make the pear mousse layer:
In a small bowl, sprinkle gelatin powder over water and let it bloom for 5 minutes. In the meantime, blend the peeled pears into a smooth puree and set aside. In a medium saucepan, heat the heavy cream and sugar over low heat until the sugar dissolves. Add the gelatin mixture and stir until completely dissolved. Remove from heat and allow it to cool slightly before mixing in the pear puree, lemon juice, and vanilla extract. - Assemble the bars:
Pour the pear mousse layer over the chilled cheesecake layer. Use a spatula to smooth it evenly. Refrigerate the bars for at least 4 hours, or overnight for best results. - Slice and serve:
Once fully set, slice into bars and serve chilled. Optionally, garnish with thin pear slices or a dusting of cinnamon.
Notes
- For a firmer mousse layer, allow the gelatin to bloom for a full 5 minutes before dissolving.
- Feel free to substitute canned pear puree for fresh pears if needed, just make sure to use unsweetened puree for best results.
- If you prefer a smoother texture, you can strain the pear puree before using it in the mousse.
- Prep Time: 30 minutes
- Cook Time: 30 minutes
Nutrition
- Calories: 320
- Sugar: 23g
- Sodium: 175mg
- Fat: 20g
- Carbohydrates: 31g
- Fiber: 1g
- Protein: 5g
- Cholesterol: 85mg