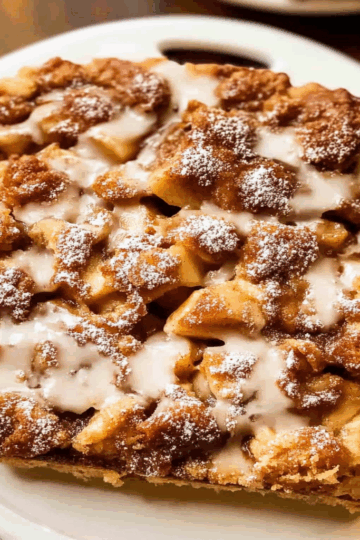
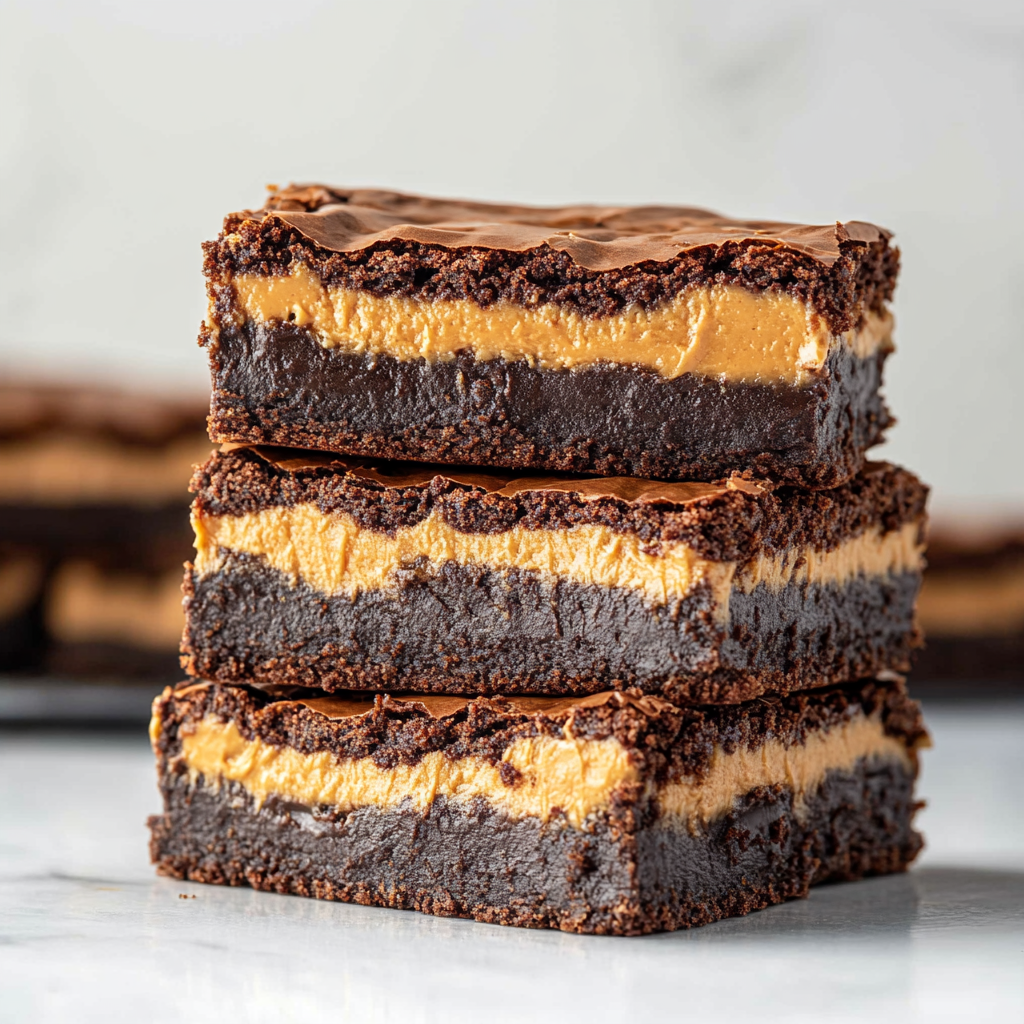
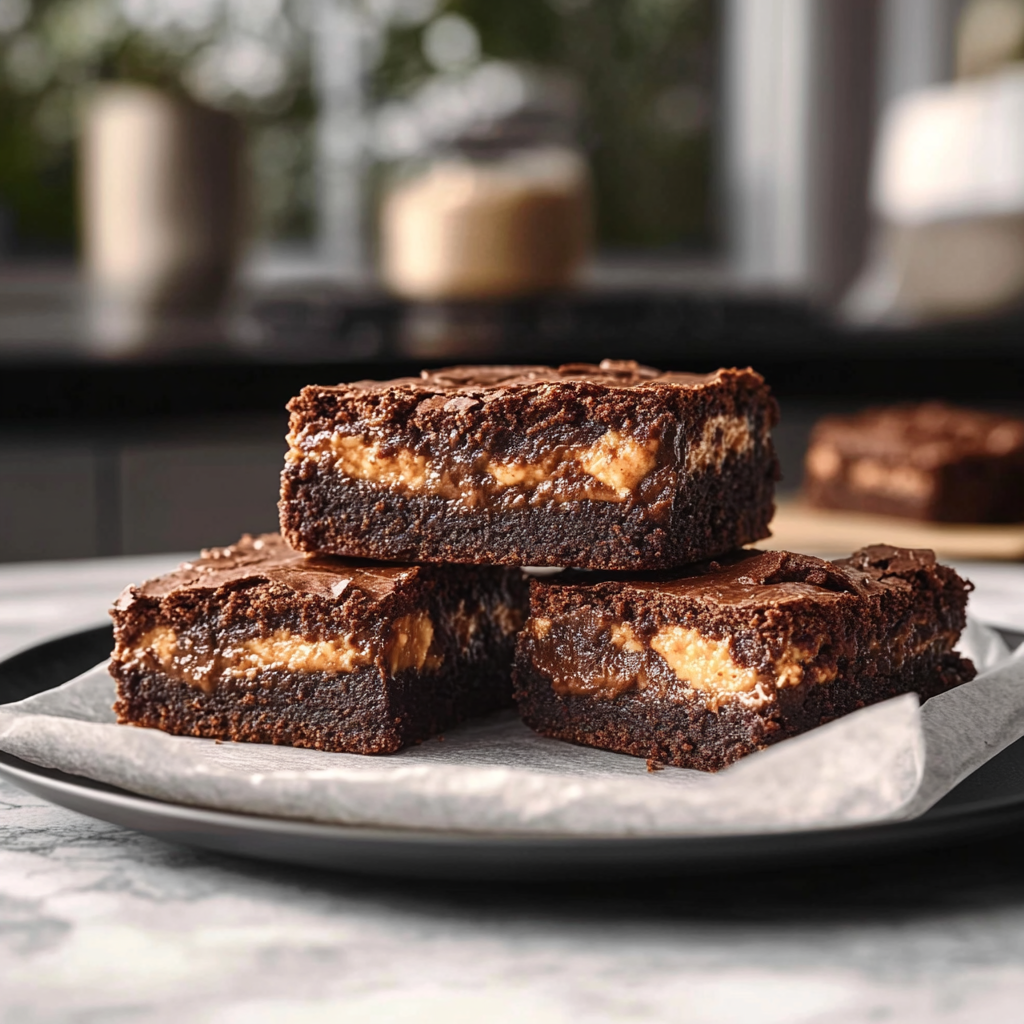
If you're a chocolate lover and a fan of the iconic peanut butter cup, then get ready to meet your new favorite dessert: Reese’s Stuffed Brownies. These decadent brownies take classic chocolate goodness to an entirely new level by incorporating the irresistible combination of rich chocolate and creamy peanut butter. Imagine biting into a fudgy brownie and discovering a gooey center filled with Reese’s peanut butter cups. It’s the kind of treat that makes you weak at the knees and is perfect for any occasion, whether it’s a family gathering, a birthday party, or just a well-deserved indulgence after a long week.
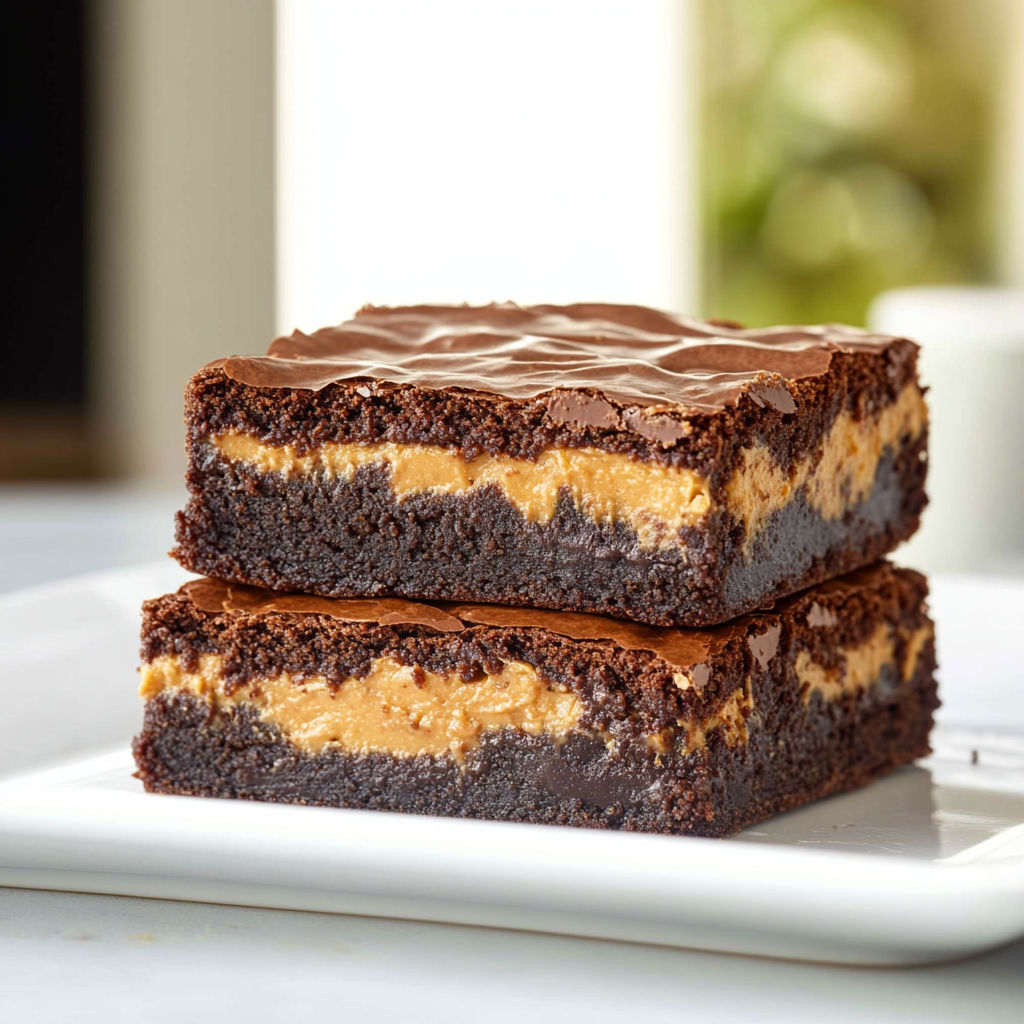
The allure of Reese’s Stuffed Brownies lies not only in their flavor but also in their delightful texture. The exterior is chewy and chocolatey, while the interior offers a melty surprise that keeps you coming back for more. Additionally, these brownies are easy to make, requiring just a handful of ingredients and minimal effort. Whether you're an experienced baker or a kitchen novice, this recipe is designed to guide you every step of the way, ensuring you achieve perfect results every time.
As you dive into this recipe, you’ll discover tips for achieving the ideal texture, ways to store your brownies, and clever variations to personalize your creation. So grab your apron and let’s get baking the most indulgent Reese’s Stuffed Brownies you’ve ever tasted!
What You’ll Need for Reese’s Stuffed Brownies
Before you start baking, gather all the ingredients and tools you’ll need to whip up these delicious brownies. Having everything ready will streamline the process and ensure you don’t miss any key components.

Ingredients for Reese’s Stuffed Brownies:
- For the Brownie Batter:
- 1 cup unsalted butter (2 sticks)
- 2 cups granulated sugar
- 4 large eggs
- 1 teaspoon vanilla extract
- 1 cup all-purpose flour
- 1 cup unsweetened cocoa powder
- ½ teaspoon baking powder
- ¼ teaspoon salt
- For the Filling:
- 12 mini Reese’s peanut butter cups (or 6 regular-sized cups, halved)
- Optional Toppings:
- Chocolate chips (1 cup)
- Additional Reese’s cups for garnish
- Peanut butter drizzle (for serving)
Tools:
- 9x13-inch baking pan
- Mixing bowls
- Whisk or electric mixer
- Rubber spatula
- Measuring cups and spoons
- Parchment paper (optional for easy removal)
How to Make for Reese’s Stuffed Brownies
Now that you have your ingredients and tools gathered, it’s time to get into the fun part: making your Reese’s Stuffed Brownies! Follow these steps carefully for fudgy, rich brownies that are sure to impress.
Step-by-Step Instructions for Reese’s Stuffed Brownies
- Preheat the Oven:
Start by preheating your oven to 350°F (175°C). This ensures that your brownies bake evenly. - Prepare the Baking Pan:
Grease a 9x13-inch baking pan with cooking spray or line it with parchment paper for easy removal later. If using parchment paper, leave some overhang on the sides to help lift the brownies out once they’re baked. - Melt the Butter:
In a medium saucepan, melt 1 cup (2 sticks) of unsalted butter over low heat. Stir occasionally to prevent burning. Once melted, remove from heat and let it cool slightly. - Mix the Sugar and Eggs:
In a large mixing bowl, combine the melted butter with 2 cups of granulated sugar. Whisk until well combined. Add 4 large eggs one at a time, mixing well after each addition. Stir in 1 teaspoon of vanilla extract. - Combine Dry Ingredients:
In another bowl, sift together 1 cup of all-purpose flour, 1 cup of unsweetened cocoa powder, ½ teaspoon of baking powder, and ¼ teaspoon of salt. This helps to aerate the dry ingredients and avoids any lumps in your batter. - Fold the Dry Ingredients into the Wet Mixture:
Gradually add the dry mixture to the wet ingredients, folding gently with a rubber spatula until just combined. Be careful not to overmix; you want the batter to be thick and fudgy. - Layer the Brownie Batter:
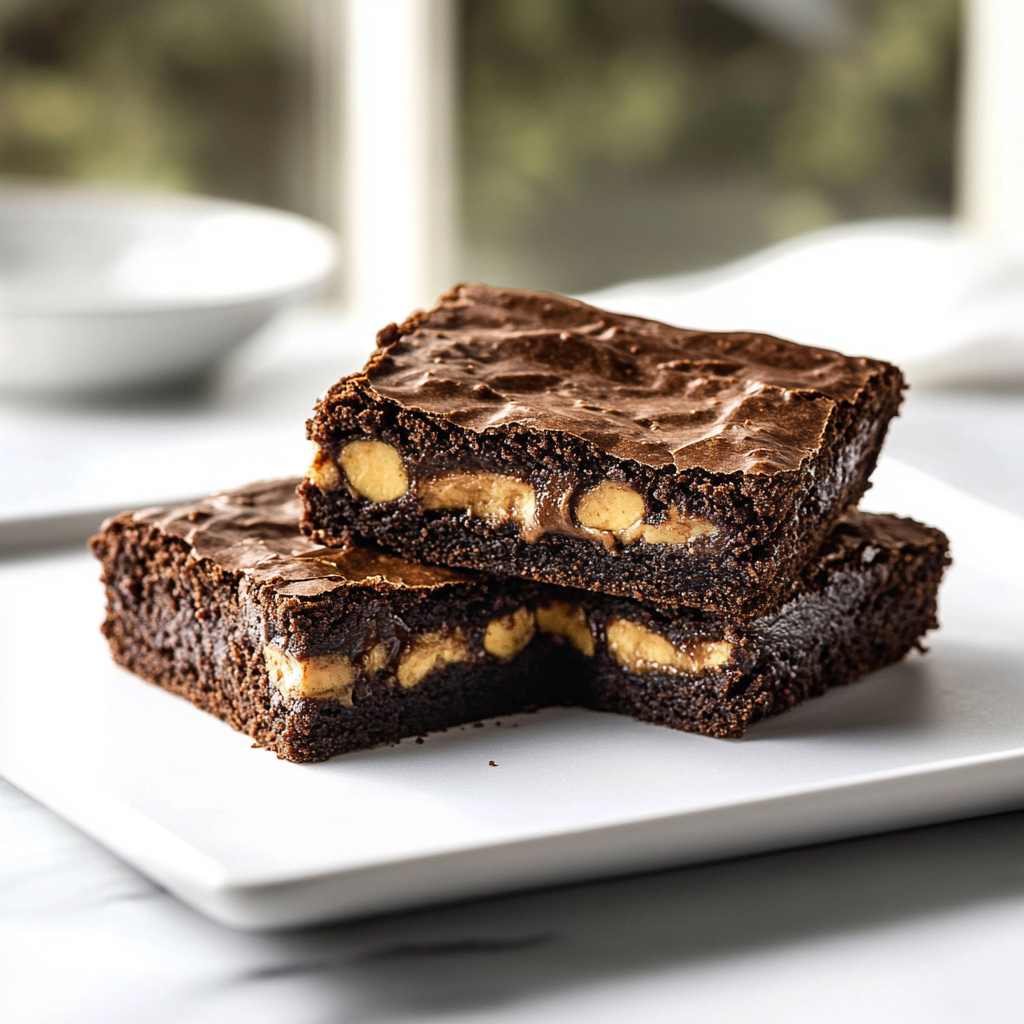
Pour half of the brownie batter into the prepared baking pan, spreading it evenly across the bottom. Next, place 12 mini Reese’s peanut butter cups (or halved regular-sized cups) evenly over the batter. Pour the remaining brownie batter on top, covering the Reese’s completely. - Add Optional Toppings:
If you want to make your brownies extra special, sprinkle 1 cup of chocolate chips on top. You can also add a few extra Reese’s cups for garnish. - Bake:
Bake in the preheated oven for 30-35 minutes. The brownies are done when a toothpick inserted in the center comes out with a few moist crumbs, but not wet batter. Be careful not to overbake, as this can lead to dry brownies. - Cool and Serve:
Once baked, remove the brownies from the oven and allow them to cool in the pan on a wire rack. After they’ve cooled completely, lift them out using the parchment paper (if used) and cut them into squares. For an extra touch, drizzle with peanut butter before serving.
Serving and Storage Tips for Reese’s Stuffed Brownies
Now that you've made your delicious Reese’s Stuffed Brownies, it's essential to know how to serve and store them properly to maximize their flavor and freshness. These tips will ensure that your brownies stay moist and delicious for as long as possible.

Serving Suggestions for Reese’s Stuffed Brownies
- Presentation Matters:
When serving, cut the brownies into even squares for a neat presentation. You can place them on a decorative platter or individual dessert plates. For an added touch, dust the tops with powdered sugar or cocoa powder before serving. - Pair with Ice Cream:
One of the best ways to elevate your brownies is to serve them warm with a scoop of vanilla ice cream. The contrast between the warm, fudgy brownie and the cold, creamy ice cream is simply divine. You can also add a drizzle of chocolate sauce or caramel for extra indulgence. - Add a Peanut Butter Drizzle:
For those who can’t get enough peanut butter, consider making a simple peanut butter drizzle. Melt a couple of tablespoons of peanut butter and drizzle it over the brownies just before serving. This not only adds flavor but also makes the presentation pop. - Garnish with Whipped Cream:
A dollop of freshly whipped cream can add a light and airy contrast to the rich brownies. You could also sprinkle some crushed Reese’s cups on top for a fun garnish.
Storage Tips for Reese’s Stuffed Brownies
- Room Temperature Storage:
If you plan to enjoy your brownies within a few days, you can store them in an airtight container at room temperature. Make sure they’re completely cooled before sealing them to prevent condensation, which can lead to sogginess. - Refrigeration:
For longer storage, keep your brownies in the refrigerator. They can last for up to a week when stored in an airtight container. Just be aware that cold brownies can be firmer, so allow them to sit at room temperature for a few minutes before serving if you prefer a softer texture. - Freezing:
If you want to keep your brownies for an extended period, consider freezing them. Cut the brownies into squares, wrap each piece tightly in plastic wrap, and then place them in a freezer-safe bag. They can last for up to three months in the freezer. When you're ready to enjoy, simply thaw them in the refrigerator overnight or at room temperature for a few hours. - Reheating:
If you’ve stored the brownies in the fridge or freezer, you can reheat them in the microwave for about 10-15 seconds for a warm, gooey treat. Just be cautious not to overheat, as this can make them tough.
By following these serving and storage tips, you can ensure that your Reese’s Stuffed Brownies remain a delicious treat for days to come.
Mistakes to Avoid for Reese’s Stuffed Brownies
Baking can be a rewarding yet challenging endeavor, and there are common pitfalls that can lead to less-than-perfect Reese’s Stuffed Brownies. To ensure your baking experience is a success, here are some mistakes to avoid:
1. Overmixing the Batter
One of the most common mistakes is overmixing the brownie batter. While it’s important to combine the ingredients well, overmixing can incorporate too much air and lead to cakey brownies instead of the desired fudgy texture. Mix until just combined, and then stop.
2. Incorrect Oven Temperature
Baking at the wrong temperature can drastically affect the outcome of your brownies. Always preheat your oven to the correct temperature and use an oven thermometer to ensure accuracy. If your oven runs hot or cold, it can lead to undercooked or overcooked brownies.
3. Not Using the Right Pan
The type of pan you use can influence the baking time and texture. Using a glass pan instead of a metal one, for instance, may require adjustments in baking time. If you prefer a fudgier texture, stick to a metal pan, as it promotes even heat distribution.
4. Skipping the Parchment Paper
While it may seem optional, using parchment paper is a game-changer for easy brownie removal. If you skip this step, you may find it challenging to lift the brownies from the pan without breaking them. Parchment paper helps ensure clean edges and easy lifting.
5. Not Letting Them Cool
Patience is key! Allowing your brownies to cool completely before cutting is essential for achieving clean slices. If you cut them too early, they may crumble or fall apart. Let them cool in the pan for about 30 minutes and then chill in the fridge if needed for cleaner cuts.
6. Using Cold Ingredients
For best results, use room temperature ingredients, especially eggs and butter. Cold ingredients can lead to uneven mixing and affect the final texture of your brownies. Take them out of the fridge in advance to ensure they warm up a bit.
7. Ignoring the Toothpick Test
Many bakers tend to rely solely on baking time, but every oven is different. Always perform the toothpick test: insert a toothpick into the center of the brownies; it should come out with a few moist crumbs (not wet batter). This ensures they are perfectly baked.
Tips and Tricks for Reese’s Stuffed Brownies
To elevate your Reese’s Stuffed Brownies and make the baking process even smoother, here are some valuable tips and tricks that can enhance your results and add a personal touch to your dessert.

1. Use Quality Ingredients for Reese’s Stuffed Brownies
The quality of your ingredients can significantly impact the flavor of your brownies. Opt for high-quality cocoa powder and real vanilla extract for a richer taste. When it comes to the Reese’s cups, using the mini version helps achieve a perfect distribution throughout the brownies.
2. Chill the Brownie Batter
For an even fudgier texture, consider chilling the brownie batter for about 30 minutes before baking. This can help the flavors meld together and create a denser, more luxurious brownie.
3. Add Espresso Powder for Reese’s Stuffed Brownies
For coffee lovers, adding a teaspoon of espresso powder to the brownie batter can enhance the chocolate flavor without making the brownies taste like coffee. This subtle addition can elevate the overall taste profile of your dessert.
4. Experiment with Mix-Ins
Don’t be afraid to customize your brownies! Besides Reese’s cups, consider adding other mix-ins like chocolate chips, chopped nuts, or even crushed pretzels for a salty-sweet contrast. The more, the merrier!
5. Swirl in Peanut Butter
For an extra hit of peanut butter flavor, you can swirl in some creamy or chunky peanut butter on top of the brownie batter before baking. Just spoon some on top and use a knife to create a marbled effect. It adds a beautiful look and a delightful flavor.
6. Serve Warm
Brownies are best enjoyed warm. If serving to guests, consider reheating individual portions in the microwave for a few seconds before serving. This melts the chocolate and peanut butter filling, making them even more delicious.
7. Store Properly
If you have leftovers (though unlikely!), store them in an airtight container with a piece of bread. The bread will help keep the brownies moist. Replace the bread as it dries out to prolong freshness.
8. Make Them Ahead
These brownies can be made a day or two in advance. In fact, they often taste better after sitting for a day as the flavors deepen. Just store them properly in the fridge and bring them to room temperature before serving.
9. Customize for Holidays
You can easily adapt this recipe for different holidays. For example, use festive sprinkles on top for birthdays or cut them into heart shapes for Valentine’s Day. You can also use seasonal candies for variations throughout the year.
Suggestions for Reese’s Stuffed Brownies
To make your baking experience even more enjoyable and to personalize your Reese’s Stuffed Brownies, consider the following suggestions:
1. Try Different Nut Butters for Reese’s Stuffed Brownies
If you love nutty flavors, experiment with different nut butters like almond or cashew butter. These alternatives can add a unique twist while still complementing the chocolate flavor beautifully.
2. Incorporate Spices
For a hint of warmth and complexity, add spices such as cinnamon or nutmeg to the brownie batter. Just a pinch can elevate the flavor profile and create a cozy, comforting dessert.
3. Use Flavored Extracts
While vanilla extract is a classic, try using almond or hazelnut extract to add a new layer of flavor. Just a teaspoon can make a big difference in taste.
4. Layer with Caramel Sauce
For those who can’t resist caramel, consider layering some caramel sauce along with the Reese’s cups. The gooey caramel adds a delightful sweetness that pairs perfectly with chocolate and peanut butter.
5. Serve with Fruit for Reese’s Stuffed Brownies
To balance the richness of the brownies, serve them alongside fresh fruit like strawberries or raspberries. The tartness of the fruit can enhance the overall flavor experience.
6. Make Mini Brownies
For bite-sized treats, use a mini muffin pan to bake your brownies. Just adjust the baking time to about 15-20 minutes. This makes for perfect party snacks or lunchbox treats.
7. Host a Brownie Bar
For gatherings, set up a brownie bar with various toppings like sprinkles, whipped cream, crushed candies, and different sauces. This interactive experience allows guests to customize their desserts.
8. Create a Layered Dessert
For an impressive dessert, consider layering the brownies in a trifle dish with whipped cream, crushed Reese’s cups, and chocolate pudding. This can be a stunning centerpiece for parties.
9. Experiment with Brownie Mix-Ins
In addition to Reese’s cups, consider mixing in crushed cookies, marshmallows, or toffee bits. Each addition brings a new texture and flavor, making your brownies even more exciting.
These suggestions allow you to get creative with your Reese’s Stuffed Brownies and make them uniquely yours. Whether you stick to the classic recipe or venture into new territory, your brownies are sure to be a hit.
FAQ for Reese’s Stuffed Brownies
As you prepare to bake your Reese’s Stuffed Brownies, you might have some questions about the process or ingredients. Here are some frequently asked questions that can help clarify any doubts and ensure your baking adventure is a success.

1. Can I use other types of candy?
Absolutely! While Reese’s cups are a delicious choice, feel free to experiment with other candies. Snickers, Milky Way, or even chopped chocolate bars can provide a fun twist. Just make sure to adjust the amounts based on the size of the candy you choose.
2. What if I don’t have cocoa powder?
If you don’t have cocoa powder on hand, you can substitute it with unsweetened chocolate. Use about 3 ounces of unsweetened chocolate for every cup of cocoa powder, melting it with the butter. Just remember to reduce the sugar slightly since unsweetened chocolate is less sweet than cocoa powder.
3. How do I know when my brownies are done?
The best way to check if your brownies are done is by performing the toothpick test. Insert a toothpick into the center; if it comes out with a few moist crumbs, they’re ready. If it’s wet with batter, they need more time. Remember, brownies will continue to cook a little after being removed from the oven, so it’s better to underbake slightly than overbake.
4. Can I make these gluten-free?
Yes! You can easily adapt this recipe to be gluten-free by substituting all-purpose flour with a gluten-free flour blend. Just ensure that your cocoa powder is also gluten-free, and you’re good to go!
5. How should I store leftovers?
Store your brownies in an airtight container at room temperature for up to 3 days. For longer storage, refrigerate them for up to a week or freeze them for up to three months. Just ensure they are well-wrapped to prevent freezer burn.
6. Can I add frosting on top?
Certainly! If you want an extra indulgent treat, consider adding a layer of chocolate or peanut butter frosting on top of the cooled brownies. This addition can elevate your dessert even more and create a beautiful presentation.
7. What should I serve with the brownies?
While these brownies are delicious on their own, they pair wonderfully with vanilla ice cream, whipped cream, or a drizzle of chocolate or caramel sauce. Adding a sprinkle of sea salt can also enhance the flavor profile.
8. Can I use crunchy peanut butter instead of creamy?
Yes, using crunchy peanut butter will give your brownies a delightful texture. It adds little bites of peanut butter that can enhance the overall experience. Just make sure it’s well-mixed before using.
Conclusion for Reese’s Stuffed Brownies
Baking Reese’s Stuffed Brownies is not just about creating a dessert; it's about crafting an experience filled with rich flavors and delightful textures. These brownies combine the beloved taste of chocolate and peanut butter in a way that leaves everyone craving more. Whether you’re making them for a special occasion or just to satisfy your sweet tooth, they are sure to impress.

Throughout this article, we’ve covered everything from the ingredients you need to the step-by-step process, as well as helpful tips, storage methods, and fun suggestions to customize your treats. The beauty of this recipe lies in its simplicity and versatility. You can make it your own by experimenting with different candies, flavors, and presentation styles, turning a classic dessert into something uniquely yours.
Moreover, these brownies are not only delicious but also easy to make, making them perfect for bakers of all skill levels. Whether you're a seasoned pro or just starting in the kitchen, you’ll find joy in creating these rich, fudgy treats.
So, gather your ingredients, follow the steps, and indulge in the deliciousness of Reese’s Stuffed Brownies. Share them with friends and family, or keep them all to yourself—either way, you’re in for a deliciously satisfying experience. Happy baking!
Print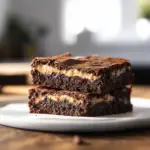
Reese's Brownie Bliss
- Total Time: 50 minutes
Description
Indulge in these decadent Reese’s Stuffed Brownies, where rich, fudgy chocolate brownies are filled with creamy peanut butter cups. Perfect for any occasion, these brownies are sure to satisfy your sweet cravings!
Ingredients
For the Brownie Batter:
- 1 cup (2 sticks) unsalted butter
- 2 cups granulated sugar
- 4 large eggs
- 1 teaspoon vanilla extract
- 1 cup all-purpose flour
- 1 cup unsweetened cocoa powder
- ½ teaspoon baking powder
- ¼ teaspoon salt
For the Filling:
- 12 mini Reese’s peanut butter cups (or 6 regular-sized cups, halved)
Instructions
- Prep the Oven and Pan: Preheat your oven to 350°F (175°C). Grease a 9x13-inch baking pan or line it with parchment paper for easy removal.
- Melt Butter: In a saucepan, melt 1 cup of unsalted butter over low heat. Remove from heat and let cool slightly.
- Mix Wet Ingredients: In a large bowl, combine the melted butter and 2 cups of sugar. Whisk in 4 eggs and 1 teaspoon of vanilla until smooth.
- Combine Dry Ingredients: In another bowl, sift together 1 cup flour, 1 cup cocoa powder, ½ teaspoon baking powder, and ¼ teaspoon salt.
- Combine Mixtures: Gradually fold the dry ingredients into the wet mixture until just combined.
- Layer the Brownie Batter: Pour half of the brownie batter into the prepared pan. Evenly distribute the Reese’s cups over the batter, then pour the remaining batter on top.
- Bake: Bake for 30-35 minutes, or until a toothpick inserted in the center comes out with a few moist crumbs.
- Cool and Serve: Allow to cool in the pan for about 30 minutes before cutting into squares and serving.
Notes
- For extra flavor, consider adding chocolate chips or a swirl of peanut butter on top before baking.
- Store leftovers in an airtight container at room temperature for up to 3 days or refrigerate for up to a week.
- Prep Time: 15 minutes
- Cook Time: 35 minutes
Nutrition
- Calories: 250
- Sugar: 20
- Fat: 12g
- Saturated Fat: 6g
- Carbohydrates: 32g
- Fiber: 2g
- Protein: 4g